
Typography is central to a polished embedded UI. This guide covers custom font management, typography settings, and the font-related features available in anyui-LIVE.
Overview
anyui-LIVE lets you import custom font files once and reuse them across your project. Fonts are converted into font libraries and embedded into the generated firmware, so target devices render text without depending on a host operating system.
Related resource concepts are covered in the image guide, and the asset pipeline is described in the codegen guide.
Custom font management
Manage fonts in the resource management interface:
- Import the font file in the Resource view.
- Open the Font Library by clicking the Font Library button in the view bar.
- Create a font library.
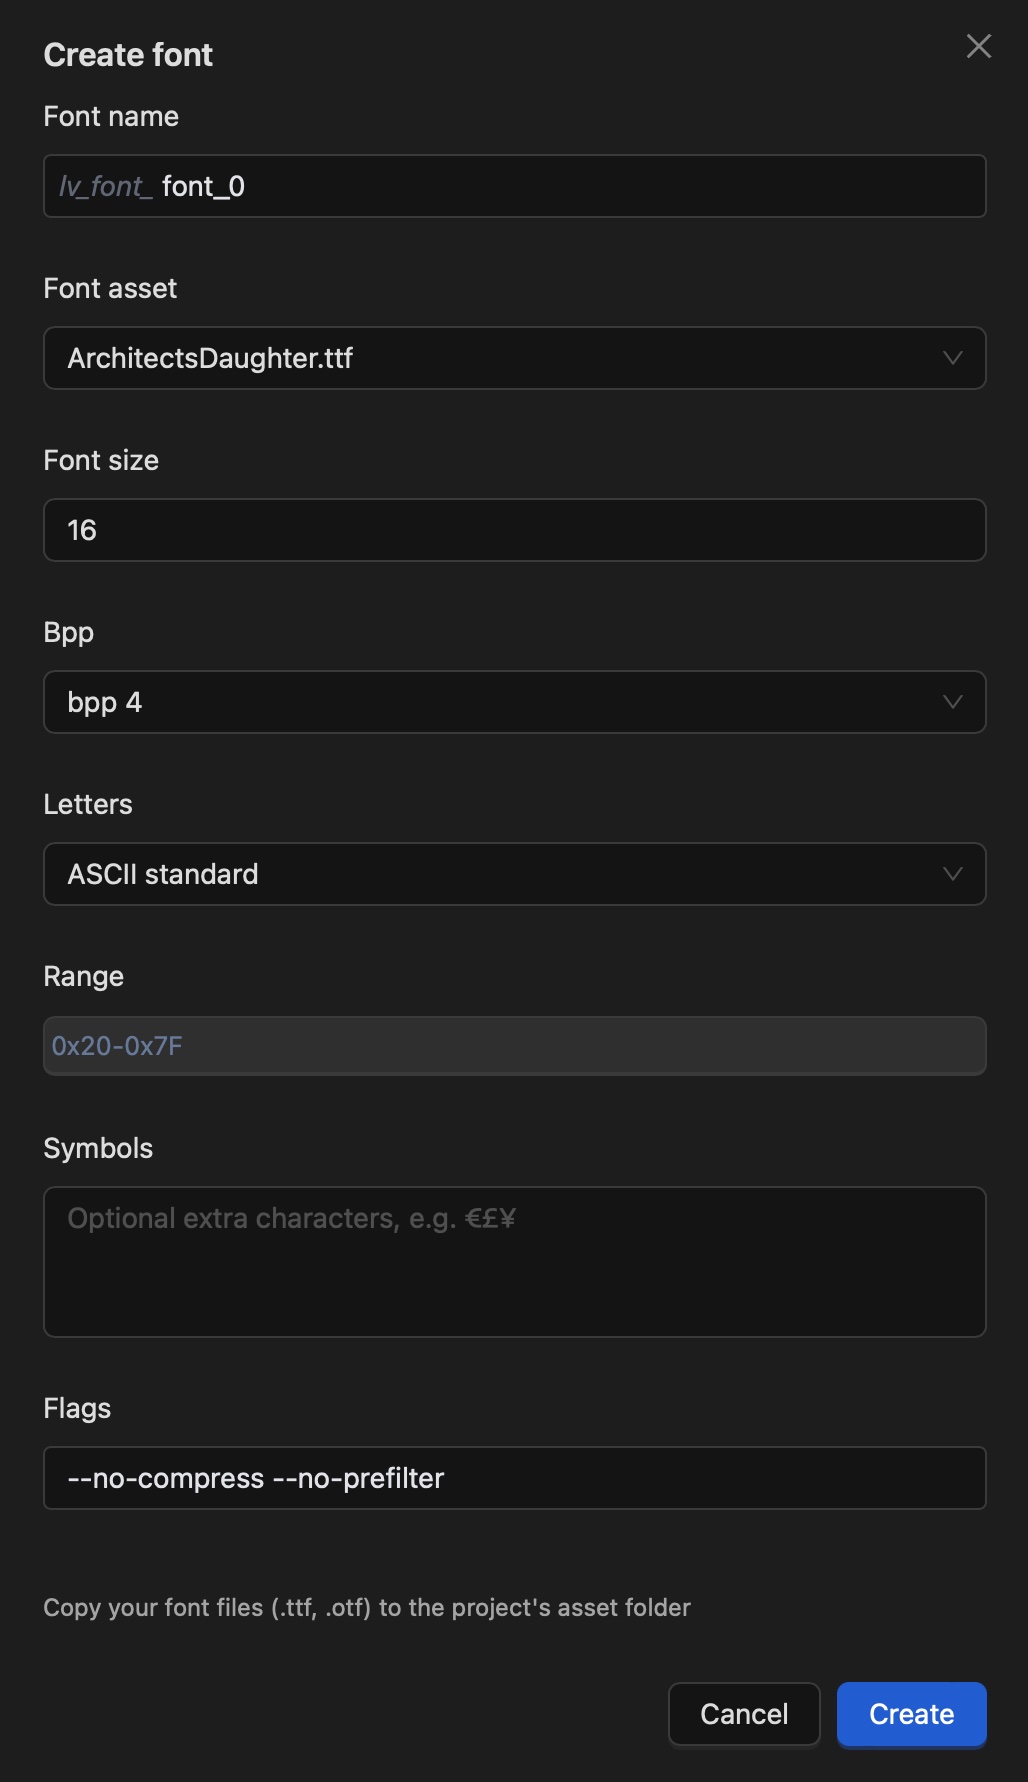
Font library settings
| Setting | Description |
|---|---|
| Font name | The name of the font library; also part of the generated font variable name. |
| Font asset | The font file used by this library. Add it to the font resources first. |
| Font size | The font size to use. |
| Bpp | Bits per pixel for the font. |
| Letters | Preset letters included in the font. |
| Range | Character range included in the font. |
| Symbols | Additional characters included in the font. |
| Flags | Extra options for font conversion. The default value is --no-compress --no-prefilter. |
For most projects, the most important items are:
- Font name - use a meaningful name.
- Font asset - select the correct font file.
- Range and/or Symbols - at least one of them must not be empty.
If you are not familiar with the other options, keep their default values.
Note
The Flags option controls LVGL font conversion:
--no-compress: do not compress the font.--no-prefilter: do not prefilter the font.
Typography settings
Fonts are applied to text components through typography properties. The following properties are commonly configured:
| Property | Description |
|---|---|
| Font | The font library to use (as created in Custom Font Management). |
| Font size | The size of the rendered glyphs. |
| Text color | The color of the glyphs. |
| Line height | Vertical spacing between lines of text. |
| Letter spacing | Horizontal spacing between glyphs. |
| Alignment | Horizontal alignment: left, center, or right. |
| Text style | Bold, italic, underline, or strikethrough. |
Typography is edited on the canvas through the editor and rendered live in the preview.
Font conversion options
At generation time, the font library is converted into a glyph bitmap table. Key conversion options:
- Bpp (bits per pixel) - lower values (e.g., 1 or 2) reduce memory usage at the cost of anti-aliasing quality; higher values (e.g., 4) increase quality and memory use.
- Range - include only the character codes your UI actually uses to keep the font table small.
- Symbols - add specific glyphs (e.g., icons) that are not part of a contiguous range.
Optimizing the character set is the most effective way to reduce ROM usage for fonts. See the codegen guide for how the emitted font code is integrated into the build.
Warning
You are responsible for ensuring that you have the necessary rights and permissions for every font you import and use.